A Jitsi-Meet online conference can be attended simply by calling up a link in the web browser. This guide shows how to create your own virtual room on a Jitsi-Meet Server and how to use the interface in the web browser and in the app.
The participants need a computer with microphone and loudspeaker or headset and, if necessary, a webcam. Most notebooks and smartphones / tablets have already integrated the components. A Jitsi web conference can be attended via a web browser without further installation. This means that Jitsi-Meet can be used on Windows, MacOS and Linux regardless of the platform. Alternatively, you can also take part in a Jitsi online conference using a smartphone or tablet using the Jitsi-Meet app, which is available for Android and iOS.
All that is required for an online meeting with Jitsi-Meet is a web browser that supports the WebRTC transmission technology. This means that all new web browsers are actually on board, with the exception of Internet Explorer, which is not one of them, for example. Jitsi-Meet itself checks whether the web browser is compatible. If not, a corresponding message appears. However, the test has shown that the Chromium web browser works best because it supports techniques like Simulcast. This reduces the bandwidth required and not only relieves the servers, but also all participants. The web browser Chrome is based on the open source project Chromium. A basis that other web browsers, such as Opera or the new Microsoft Edge web browser, use. In terms of bandwidth, approximately 2 Mbit/s can be expected for uploading your own video. And also for the download 2 Mbit/s per participant. In addition, Jitsi provides its own app for smartphones and tablets for download for Android and iOS.
In order to participate in a virtual Jitsi-Meet meeting, a microphone is required, either integrated in the notebook or in a headset. A headset is particularly recommended in environments with other noises. A camera can, but does not have to be used. In principle, a meeting can also be attended without a microphone and camera if you only want to listen.
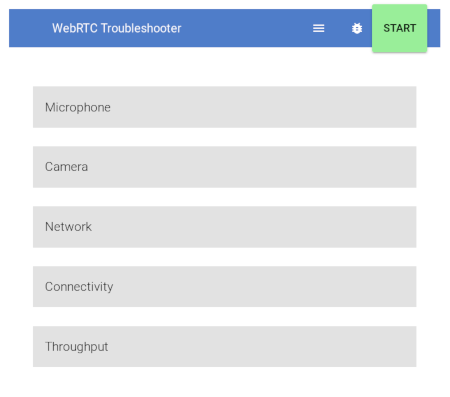
The web browsers can be tested for support from Jitsi-Meet using the Google WebRTC Troubleshooter service.
It is currently recommended that video conferencing should preferably be carried out with the Google Chromium, because using the other web browsers can lead to unpleasant side effects until the entire meeting is canceled. This partly depends on the browser version used. Since many users lack the technical background knowledge, it makes sense from the start to use this web browser or the Jitsi app.
Access to the camera and microphone is required here in order to then be able to take the test. The test is started by clicking the start button of the application. At the same time, the network connection and connectivity are tested.
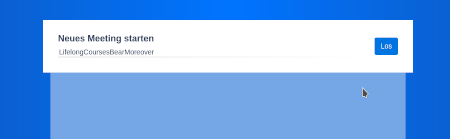
On the Jitsi-Meet welcome page, elements that can be individually set by the operator are presented, such as the logo and text, a session history, the input field for the name of the meeting and a settings menu.
The settings for the online meeting are in the gear at the top right.
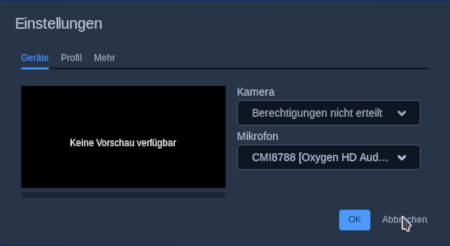
Here you can specifically set your camera and audio settings again before the start of a meeting. In addition, you can set your name in the meeting, which can also be set later in the session, and optionally enter an email address and you can set your language.
Jitsi-Meet is basically configured so that everyone can create a meeting and be the operator for the meeting they have created, to which they can then invite. Jitsi-Meet thus builds on the concept that all users have almost the same rights. Therefore, there is no distinctive role system as with other web conference systems. Only the first participant who enters a Jitsi-Meet conference room receives additional functions. He can set the access password, mute other participants by default or remove participants. If the previous operator leaves the meeting in a meeting created in this way, the next moderator automatically becomes the next. and the moderator functions are automatically passed on. The moderator is marked with an asterisk at the bottom right. However, this is only visible when the mouse is moved over the preview image of the user. With a click of the other participants on the star, the focus is set on the moderator and the current speaker is no longer automatically focused.
With authentication
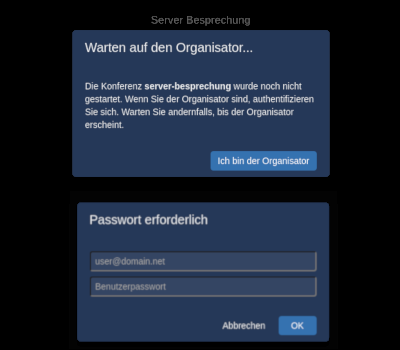
However, Jitsi-Meet can also be configured so that only authorized operators can create and invite meetings. In this case, after sending the meeting name, a message about the meeting status and the request to authenticate via a login mask appears.
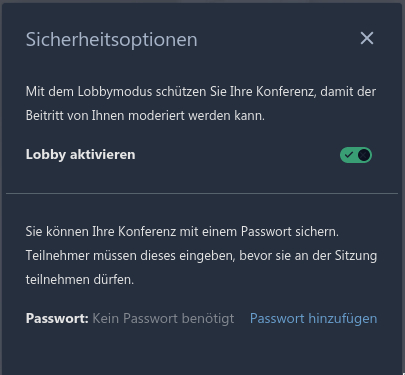
The Jitsi Meet lobby can be used to gather participants in an audio or video conference and then start them together. So it's a waiting room where people are before a virtual meeting starts. At the same time, the moderator can use the names to check who is taking part in this Jitsi Meet event. So the person who entered the virtual conference room first is in the role of the moderator. This can activate the lobby via the security functions within the settings next to the listener button. The password can also be assigned there.
To activate the Jitsi Meet lobby, click on the switch next to "Activate lobby". If the lobby is activated, the switch turns green and an additional checkmark appears to confirm. When the lobby is activated, a message is displayed to new participants to inform them that they first have to be approved by the moderator. The moderator of the Jitsi Meet room also receives a message and can approve the new participant with one click. The name entered is displayed in the message “List of waiting participants” and the two buttons “Accept” and “Reject” appear for selection. If the request is confirmed, the participant appears in the virtual meeting room.
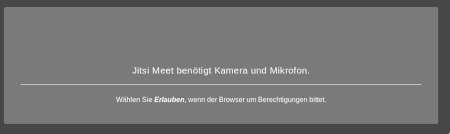
It's easy to join a Jitsi-Meet conference. It is sufficient to open the link received in the web browser. Now the question appears whether access to the camera and the microphone should be allowed. This can be approved using the "Allow" button.
After logging in, the participants of the meeting are displayed on the right. Your own recording is marked with a "me" or your own name. Above all, Jitsi-Meet automatically recognizes the current speaker and enlarges its video image. In addition, the speaker is marked with a blue icon. And for each participant there is an icon in the top left, which looks like the WLAN symbol and with which the connection quality can be displayed.
The essential controls for the online conference are located in the lower area of the browser. As shown in the figure, there are nine controls. The most important are the three middle buttons. You can leave a conference with the handset button (5). With the micro button (4) and the camera button (5), on the one hand, the connected devices can be selected and, on the other hand, the microphone or camera can be switched on and off.
The essential controls for the online conference are located in the lower area of the browser. As shown in the figure, there are nine controls. The most important are the three middle buttons. You can leave a conference with the handset button (5). With the micro button (4) and the camera button (5), on the one hand, the connected devices can be selected and, on the other hand, the microphone or camera can be switched on and off.

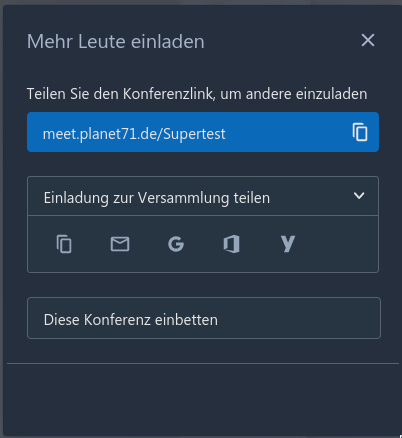
A click on the tile button opens the list of participants on the right. Here there is the button "Invite more people" which opens a dialog window with the link of the current web conference and the functions to copy it to the clipboard. Below that there is the option "Share invitation to the meeting" to share the link to the current Jitsi Meet room via various services. The item “Embed this conference” is intended for web developers in order to permanently embed the conference on a website. If the module is configured for the integration of a SIP telephone system, the telephone number and the PIN code appear there in order to take part in the Jitsi Meet conference by telephone. If several telephone numbers are configured for a local dial-in with country code, the link "Additional telephone numbers" appears below.
The hand signal (2) is used to report the need for a conversation, since Jitsi Meet prefers to audibly switch the active speaker. So the moderator can intervene. With the chat symbol (3) one can conduct private chats and chats in the whole round. And with the tile button (7) all participants can be tiled at the same time.
The info button (8) is interesting for everyone to share the meeting. On the other hand, the operator can also create and pass on a password in addition to the invitation. When creating the password, it should be noted that after entering the password, the entry is also validated on the computer with the Enter key. You can also see that you can delete the password using a corresponding button.
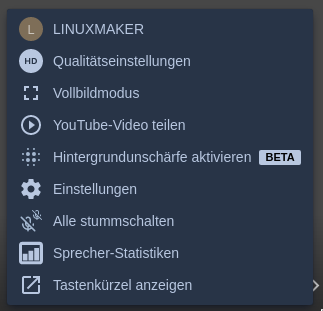
The last button (9) is again interesting for everyone. The moderator settings are shown, which may be a little more. But basically everyone here can change their settings or make YouTube videos available. If you don't want to show the surroundings, you can switch the background sharpness on and off.
In addition to this, the moderator can mute the participant, throw him out or send a private chat message to each participant's web picture using the three-point button. But he can also mute everyone so that everyone has to turn on his microphone separately.
It is also interesting to use keyboard shortcuts when mouse operation is inconvenient or not possible.
| Function | Key | |
| Turn video thumbnails on or off | F | |
| Activate or deactivate mute | M | |
| Start or stop the camera | V | |
| Manage call quality | A | |
| Open or close chat | C | |
| Switch between camera and screen sharing | D | |
| Hold hands | R | |
| Activate or deactivate full screen mode | S | |
| Toggle tile view on or off | W | |
| Show or hide keyboard shortcuts | ? | |
| Push-to-talk (talk button) | SPACE | |
| Show statistics for speaker | T | |
| Focus local video | 0 | |
| Focus on another participant’s video | 1-9 |
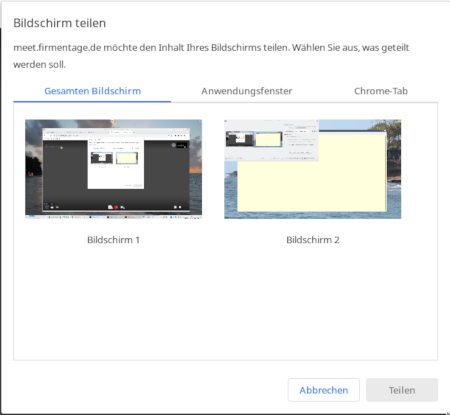
If you want to make a video, presentation or other interesting information available to be viewed by the other participants from your own computer in the conference, you can do so using the share button (1). Here you have the choice to share the entire monitor or to share only individual application windows - for example a presentation or a video player. The third option is to share individual web browser tabs.
With another kick on the share button (1) and the equivalent shortcut ends this process again.
The red handset button (5) in the lower center ends the Jitsi meeting and the online meeting is closed. A virtual room does not have to be actively closed. As soon as the last person has left the room, all information will be deleted. This includes the chat and the list of participants. If someone then calls up the link again, the person is in a new room using the same URL.
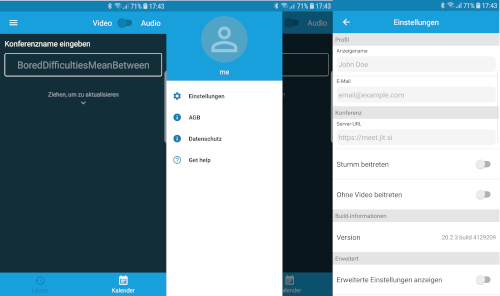
You can also use Jitsi-Meet via the web browser on your smartphone or tablet, but the corresponding Jitsi app for the respective operating system is much more convenient.
The procedure is different here, since you have to store the server name in the settings before a meeting. Because the Jitsi server of the developer is entered by default and you end up in a completely different and new conference for yourself. Only then can you enter the name of the online meeting and join. A copy&paste of the complete link is not recommended here!
If you have problems using Jitsi-Meet conferences, these tips usually help.