Basic configuration of the RaspBerry Pi
Ronald Raike's project is very helpful because it takes care of the tedious process of compiling Asterisk and the FreePBX framework for the Raspberry Pi architecture. This can be very time-consuming if you don't have sufficient knowledge of Asterisk, Raspberry Pi hardware, and FreePBX.
But at least we don't have to follow the initial steps of the instructions, since we already have a functioning Raspberry Pi system. We don't need everything the maintainer describes in his ReadMe file before "Insert the SD card and power up the Raspberry Pi," since our Raspberry Pi is already running. We start the installation directly with ./install from the installation directory in the Raspberry Pi's home directory. We can partially implement the recommended configuration if we haven't already done so. Otherwise, it will be a long installation with multiple reboots and repeated logins as root. Fortunately, the script continues from where it started the reboot. For me, the entire installation of Asterisk took about 2 hours.
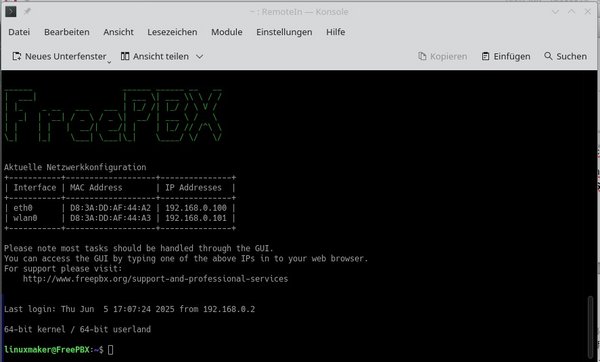
If the MOTD does not appear in this form, but the standard Debian message does, it's not a big deal. Then we'll just create it, because the basis of this welcome message is the command
~# fwconsole motd
We then create a dynamic MOTD
~# vi /etc/update-motd.d/50-fwconsole
with this content
#!/bin/sh
/usr/sbin/fwconsole motd 2>/dev/null
Then deactivate the static MOTD, dynamic existing MOTDs and activate your own MOTD
~# chmod -x /etc/update-motd.d/*
~# chmod +x /etc/update-motd.d/50-fwconsole
~# run-parts /etc/update-motd.d/
Now the FreePBX greeting should appear with every login.
We then begin the actual configuration of Asterisk in the web browser by accessing the assigned IP address. In this installation with a Raspberry Pi, a WLAN interface is already configured, which is ideal for the web GUI, while the LAN interface is reserved for telephony.


